Make Easy Floating Ornaments with a Cricut
[videojs youtube=”http://www.youtube.com/watch?v=LHFr7ZNXf0Y”]
Get the free ornament templates and designs at https://jennifermaker.com/easy-floating-ornaments-cricut
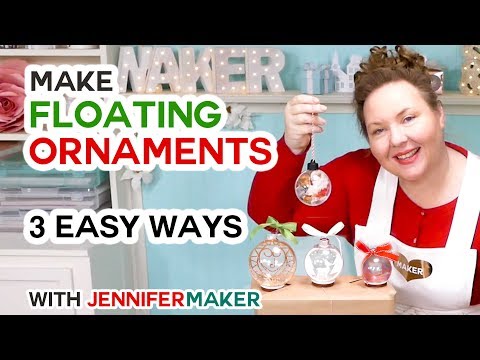
Learn how to make floating ornaments the easy way with a Cricut. I show you three different ways to do it, including a photo ornament!
NOTE: Cricut Design Space updated shortly after I made this video. To see those updates and make the necessary changes for this tutorial, please watch https://youtu.be/jVpzDmz5ago
Materials List (contains my affiliate links):
– Clear ornaments in a variety of sizes – get them at https://amzn.to/2L6ua1N
– Photo Ball – get it at https://amzn.to/2rrTAOb
– Acetate – get it at https://amzn.to/2SAqcB2
– Vinyl – get the textured copper metallic vinyl I used at https://amzn.to/2rqQ9aF
– Transfer tape
– Cardstock
– Tacky glue or spray adhesive
– Tweezers
– A way to cut your materials (I used the amazing Cricut)
– My free SVG/DXF/PDF cut files/patterns available in my free resource library at https://jennifermaker.com/resource-library
UPDATES/CHANGES: Check for any updates, changes, or additional videos for this project at https://jennifermaker.com/updates
Today we’re making what’s known as floating ornaments. No, that doesn’t mean that they float about in a pool of water! Thought that might look cool! No, It means they have an image INSIDE the clear ornament just appearing to float there as if by magic. Now last year I made a floating ornament the hard way — I took a clamshell ornament and hot glued this pretty paper scene inside it. But today I’m going to show you a MUCH easier way to get an image to float inside a clear ornament. In fact, I’m going to show you THREE different ways to make easy floating ornaments on a Cricut.
So you can make a floating ornament from nearly any type of ornament that has a smooth and clear exterior, like the ones on this tree. You just need to be able to get inside the ornament somehow. What you may want to avoid is an ornament with a faceted, textured, or less transparent exterior, like this one, because it’ll be very hard to see your floating image inside.
But you can use any size of ornament. I went out to the store and found all the sizes of clear ornaments available — everything from round ones that are 100 mm, 80 mm, and 60 mm to these flatter oval ornaments at 70 mm and 60 mm to these tiny little 40 mm ornaments. Even this lightbulb shaped ornament would work!
I’ve taken all of these commonly-shaped ornaments and created a series of ornament templates for you to use to create floating ornaments yourself. And you’ll use these templates to create your interior image — anything from a photo to text to a design, or any combination. And I’m going to show you exactly how to do that in each of the three ways.
For this project, you’ll need your ornaments — glass or plastic — and some transparency film, acetate, vinyl, an/or paper. You’ll also want to download my ornament templates so you don’t have to guess at the size and shape to use for your project. You’ll find those templates free in my resource library. https://jennifermaker.com/resource-library/
Key concepts taught in the video tutorial include how to slice, how to Print Then Cut, how to insert an image into an ornament, and how to fix an issue.
#cricut #cricutmade #designspace
I appreciate every subscriber. It’s free and easy to subscribe — just click: http://bit.ly/sub2jennifer
Prefer to get my updates and free project patterns delivered straight to your e-mail inbox? Subscribe to my free newsletter at https://jennifermaker.com (scroll to the bottom)
Follow me at:
Blog: https://jennifermaker.com
Facebook Page: https://www.facebook.com/jennifermakercrafts
Facebook Group: https://www.facebook.com/groups/cricutcraftersandmakers/
Instagram: https://www.instagram.com/jennifer.maker
Pinterest: https://www.pinterest.com/jenuinemom
Please subscribe to my channel at https://www.youtube.com/c/jennifermaker for more video tutorials to craft a life you love!
Credits:
Introduction: PixelBytes (my child!)
Music: Cute by Bensound (licensed, royalty and copyright free)
Videography: Jennifer Marx on a Panasonic Lumix FZ-1000 DSLR 4K camera
Design: A Jennifer Maker original!
