DIY Cut Out Characters – Make HUGE Larger Than Mat Projects with Stands!
[videojs youtube=”http://www.youtube.com/watch?v=b4bPlSA7XuU”]
Get the free “Penny the Penguin” character at https://jennifermaker.com/diy-cut-out-characters
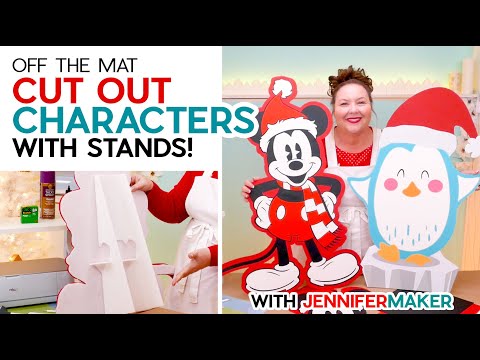
Learn how to make DIY cut out characters bigger than your mat! Sometimes, you just need to go BIG! And with some creative cutting and gluing, a Cricut can totally help make projects larger than your mat. I showed you a version to make a cardstock Baby Yoda at https://youtu.be/GbE9TOtUbK0 . And of course the giant unicorn decal. But what if you want to make DIY cut out characters that stand up and much as they stand out? I’ve got a new project just for you!
Character cutouts are a hit at birthday parties, showers, and business openings, but they have to be pretty big to make a splash. Much bigger than a cutting mat! Luckily, when a design is too big to fit on a standard mat, Cricut Design Space has helpful tools to make your DIY cut out characters come to life! With shapes, alignment, and the Slice tool, you can make big designs into pieces small enough to cut. I’ll show you how to make it work on a multi-layer design, but the process is even easier on simple projects with one large layer.
I appreciate every subscriber. It’s free and easy to subscribe — just click here: http://bit.ly/sub2jennifer
Topics covered in this Larger Than Mat Tutorial:
0:00 – Let’s Make Big Cut Out Characters!
2:06 – Supplies & Tools
3:26 – Find Your Character Design
4:35 – Download My Free Penguin SVG
5:43 – Prepare Your Character
14:21 – Cut Out Your Pieces
16:26 – Pieces Your Design Back Together
18:45 – Attach Your Layers
20:17 – Add a Backing and a Stand
25:52 – Make Santa Mickey Mouse
MATERIALS LIST (contains my affiliate links):
View my Amazon shopping list with the exact items we used to make this project at https://a.co/7aZzmox
* 12″ x 12″ Cardstock – https://amzn.to/3MdvrUc
* Corrugated Plastic Yard Signs, two sheets of 24″ x 36″ 4mm thick – https://amzn.to/3NsvqfC
* A way to cut your cardstock. I used the amazing Cricut Maker 3 but you can also use the original Maker or an Explore series machine with the Fine Point Blade – https://jennifermaker.com/which-cricut-should-i-buy/
* Green StandardGrip Machine Mat, 12″ x 12″
* Craft Glue – http://jennifermaker.com/bearlyart
* Spray Adhesive – https://amzn.to/3EsdzTI
* Scotch Tape – https://amzn.to/3WkBOKb
* Craft Knife – to cut the Corrugated Plastic – https://amzn.to/3zoNQs1
* Ball-tip stylus – https://amzn.to/3TMyPZo
* Brayer – https://amzn.to/3TcLTGI
* Stainless Steel Cork Backed Ruler – 36″ – https://amzn.to/3Ejy6tI
* Spatula – https://amzn.to/3NgSaPJ
* Design #441 (My free SVG/PDF/DXF design files (available in my free resource library at https://jennifermaker.com/library )
#cricut #cricutmade #designspace
============
Follow me at:
Blog: https://jennifermaker.com
Facebook Page: https://www.facebook.com/jennifermakercrafts
Facebook Group: https://www.facebook.com/groups/cricutcraftersandmakers/
Instagram: https://www.instagram.com/jennifer.maker
Pinterest: https://www.pinterest.com/jenuinemom
Please subscribe to my channel at https://www.youtube.com/c/jennifermaker for more video tutorials to craft a live you love!
Credits:
Introduction: PixelBytes (my child!)
Music: Cute by Bensound (licensed, royalty and copyright free)
Videography: Jennifer Marx on a Panasonic Lumix FZ-1000 DSLR 4K camera
Design: A Jennifer Maker original!
