DIY Cardstock Cutouts Larger Than Mat: Baby Yoda is Off the Mat!
[videojs youtube=”http://www.youtube.com/watch?v=GbE9TOtUbK0″]
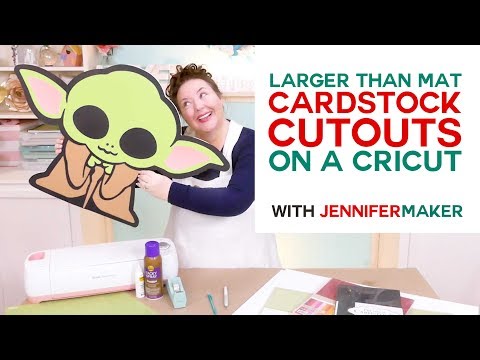
Learn how to cut an image larger than 12″ x 24″ on Cricut and make a large cardstock cutout of a favorite character or image, such as Baby Yoda! Get the licensed design on Cricut Design Space at my affiliate link: http://shrsl.com/204gm
Use my larger than mat technique to cut any image on your Cricut, regardless of how big it is.
You can find the written tutorial at https://jennifermaker.com/cardstock-cut-outs-larger-than-mat/
I appreciate every subscriber. It’s free and easy to subscribe — just click here: http://bit.ly/sub2jennifer
MATERIALS LIST (contains my affiliate links):
* Cardstock in sizes from 8.5″ x 11″ up to 12″ x 24″ (I used this 12″ x 24″ cardstock, and this 12″ x 12″ cardstock): https://amzn.to/351vqMV
* Tape
* Tacky Glue
* Adhesive spray
* (Optional) Foam core (to make a rigid back and stand): https://amzn.to/2RxKpua
* (Optional) Craft knife (to make a rigid back and stand): https://amzn.to/2P23DpP
* StandardGrip cutting mat (either the 12″ x 12″ size or the 12″ x 24″ size)
* A way to cut the project (I used the amazing Cricut — see http://shrsl.com/1dq4w )
* The licensed image from Disney, which you can get via Cricut Design Space at http://shrsl.com/204gm
Still mystified by how this works? You can totally cut this Disney character or any other large character or other image, on your Cricut cutting machine, even though the largest cutting mat you can use with a Cricut is 12″ x 24″. You even do it with a standard 12″ x 12″ cutting mat. And I’m going to show you the secret to doing it and cutting “off the mat” in this tutorial.
For this larger than mat project, you’ll need some cardstock — any size from 8.5 by 11 inches all the way up to 12 by 24 inches will work, though the bigger the paper, the less work for you. Weight doesn’t matter a lot — you can use 65 lb, 80 lb, or 110 lb, though the heavier the cardstock, the sturdier it will be. You also need a cutting mat, ether the 12 by 12 inch size or the bigger 12 by 24 inch size. And you need some tape, glue, and spray adhesive. If you want to make your cardstock cutout lean against a wall or even stand entirely on its own, you’ll also want a couple of sheets of foam core and a craft knife to cut it with (you can’t cut foam core on your Cricut because it’s much too thick).
You also need a design that’s appropriate for this technique, so one that is all or mostly solid with extra layers on top will work best. There’s a lot of character designs over in Cricut Design Space that are ideal. Buying them through Cricut Design Space means you’re using properly licensed images.
In this tutorial, I will show you where to find great designs for cardstock cutouts in Cricut Design Space, and then how to prepare the design for larger than mat cutting!
Step 1: Find an Image for a Large Cardstock Cutout
Find an image you want to make of a large cardstock cutout, such as the Disney design in Cricut Design Space, which is part of a Star Wars cartridge you can buy at http://shrsl.com/204gm
There are many other great options ideal for large cardstock cutouts in Cricut Design Space, too! You can also upload SVG cut files — if you’re not sure how to upload an SVG cut file to Cricut Design Space, watch this helpful video training series I made. If you’re on an iPhone or iPad, here’s how to download and upload SVG files to the Cricut Design Space app.
Step 2: Prepare Your Image for Cutting
This next step is the key to cutting a larger than mat image! You want to break apart the images that are too large into mat-sized pieces. Here’s how you do that…
First, resize your image to the desired size. Be mindful of the size of your mat (either 12″ x 12″ or 12″ x 24″) and try to keep your image sizes in those increments. I enlarged my baby Yoda to be about 22″ tall by 33″ wide so it would fit within the 12″ increments.
#cricut #cricutmade #designspace
============
Follow me at:
Blog: https://jennifermaker.com
Facebook Page: https://www.facebook.com/jennifermakercrafts
Facebook Group: https://www.facebook.com/groups/cricutcraftersandmakers/
Instagram: https://www.instagram.com/jennifer.maker
Pinterest: https://www.pinterest.com/jenuinemom
Please subscribe to my channel at https://www.youtube.com/c/jennifermaker for more video tutorials to craft a life you love!
Credits:
Introduction: PixelBytes (my child!)
Music: Cute by Bensound (licensed, royalty and copyright free)
Videography: Jennifer Marx on a Panasonic Lumix FZ-1000 DSLR 4K camera
Design: A Jennifer Maker original!
