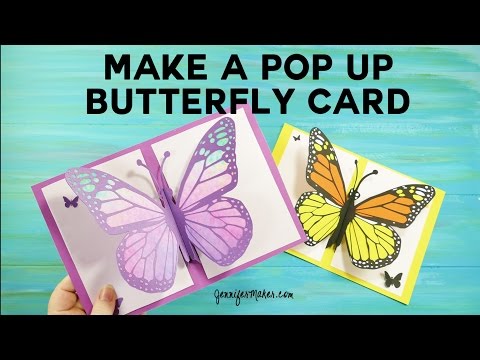
Pop Up Butterfly Card Tutorial (Three Versions)
[videojs youtube=”http://www.youtube.com/watch?v=TOEh3aoY-94″]
Learn how to assembly my butterfly pop-up card in three different ways. Get the files for the card (Design #29) on my web site at https://jennifermaker.com/diy-pop-butterfly-card-tutorial-easy-5-x-7/
NOTE: Cricut Design Space updated after I made this video. To see those updates and make the necessary changes for this tutorial, please watch https://youtu.be/jVpzDmz5ago
MATERIALS LIST (contains my affiliate links):
65 lb. cardstock in complementary/contrasting colors (1-3 sheets for the wings, 1 sheet for the outside of the card, and 1 sheet for the inside of the card) https://amzn.to/2synpyZ
A way to cut out your butterfly https://jennifermaker.com/best-DIY-and-crafting-tool-ever
Spray adhesive (I used 3M Spray Mount) https://amzn.to/2s7YXSx
My cut files (Design #29) (they are in my free resource library — https://jennifermaker.com/resource-library/ )
UPDATES/CHANGES: Check for any updates, changes, or additional videos for this project at https://jennifermaker.com/updates
HOW TO MAKE THE POP-UP BUTTERFLY CARD
First, cut out your cardstock for the version you wish to make (review my video linked above to see all three versions). If you use a Cricut, I recommend you cut on a clean StandardGrip mat on the cardstock setting.
If you are assembling the simple version, just slot the two halves of the butterfly together and wrap the outer card around them. Use spray adhesive to stick the rectangle sections of the slotted butterflies to the outer card, just be careful not to get any adhesive on the wings.
Place the inner rectangles on the rectangle sections of the slotted butterfly wings, being careful to center them top-to-bottom and not overlap on the body of the butterfly.
Now place the wing color piece(s) on the slotted butterfly wing. If you’re going for the fantasy rainbow version, you’re using one full wing insert piece.
The Monarch butterfly uses six pieces, which all fit together like a puzzle. As you place the pieces on, check to make sure you’re covering all open areas. Press down well once in position. Repeat for the other wing.
Once the wing color is in place, spray the back wing pieces with adhesive and place over the colored wing. Be sure to line up the back wing so it matches your wing assembly perfectly, then press into place.
Fold the assembled wings where the body meets the rectangle.
Slot the wings together (one slides into the other from top to bottom).
Now it’s time to attach the outer card. First, you’ll want to fold the butterfly and put the small black butterfly cut-outs back into position (these will protect the inner cardstock when we spray adhesive in the next step).
Protect the wings with some scrap paper and spray both the front and back of the folded butterfly assembly.
Remove the black butterfly inserts to reveal the white butterflies again, then line up the outer card with the butterfly assembly so the butterflies all line up.
Put black and orange butterfly inserts into the empty spaces on the front of the card to cover the adhesive underneath.
Feel free to put any extra butterfly inserts you have on the insert of the card. You can even fold the wings up a bit for a three dimensional effect.
Your butterfly card will fit in a standard 5″x7″ envelope.
#cricut #cricutmade #designspace #cricket
============
Follow me at:
Blog: https://jennifermaker.com
Facebook Page: https://www.facebook.com/jennifermakercrafts
Facebook Group: https://www.facebook.com/groups/cricutcraftersandmakers/
Instagram: https://www.instagram.com/jennifer.maker
Pinterest: https://www.pinterest.com/jenuinemom
Please subscribe to my channel at https://www.youtube.com/c/jennifermaker for more video tutorials to craft a life you love!
Credits:
Introduction: PixelBytes (my child!)
Music: Playful (royalty and copyright free)
Videography: Jennifer Marx on a Panasonic Lumix FZ-1000 DSLR 4K camera
Design: A Jennifer Maker original!
