Make a Large Vinyl Wall Decal – How to Cut Larger Than Mat on a Cricut!
[videojs youtube=”http://www.youtube.com/watch?v=DDyMpZKW2RM”]
Get the free unicorn decals (two variations!) at https://jennifermaker.com/large-wall-decal-larger-than-mat-cricut
I love decorating the walls in my house. I’ve been known to paint them with murals and cover them with photos. But now that I have a cutting machine, it’s SO easy to create my own wall decor with vinyl! But here’s the thing — I like to make wall decor that is BIGGER than will fit on a standard 12″ x 12″ cutting mat. At first it might seem impossible, but you CAN totally do it and I’m going to show you how to make these large wall decals and larger-than-mat projects.
MATERIALS LIST (contains my affiliate links):
• Removable vinyl, preferably in rolls (I used the Cricut brand — one roll each of Cream, Caribbean Blue https://amzn.to/2ThyXAC , Sunshine Yellow https://amzn.to/2WiOl1E , Flamingo Pink https://amzn.to/2S8ulzn , and white, plus two rolls of Grape https://amzn.to/2TgJcFB )
• A 24″ long cutting mat (if you don’t have one, you can use a 12″ cutting mat and cut the design into smaller sections) https://amzn.to/2MAaBzF
• Transfer tape (I used three rolls of Cricut transfer tape) https://amzn.to/2CS14j8
• Painter’s tape
• Weeding tool
• Scissors
• Craft knife or X-acto knife https://amzn.to/2G3Es24
• A way to cut your vinyl (I used the amazing Cricut)
• My free SVG/DXF/PDF cut files/patterns (available in my free resource library—get the password at the bottom of this post)
UPDATES/CHANGES: Check for any updates, changes, or additional videos for this project at https://jennifermaker.com/updates
First, let’s consider the type of walls that work best — these large vinyl decals are going to work best on smooth walls. You’ll find it a challenge if you have textured walls. For this tutorial, I had Greg paint a 4′ x 4′ board with an interior flat paint, exactly the same stuff most of us have on our walls. And I put large, 3-foot square vinyl decoration on it. Also be sure your wall is clean and free of dust.
Next, the vinyl! It’s important that you use removable vinyl on your walls — if you don’t, then when you go to remove your large wall decal because it’s time to move or you want to refresh your look, you might accidentally take some drywall off with it. But if you use removable vinyl, you won’t have any issues removing it. Cricut says it’s removable for up to two years, no doubt because adhesives do break down over time. So keep that in mind, especially if you’re a renter.
And what about the mat? You CAN use a standard 12″x12″ mat to do this if that’s all you have, but if you can get a 12″x24″ mat — it’ll mean less work for you! I used a 12″ x 24″ cutting mat. In fact, I used two so I could get the next mat ready while the other one was cutting.
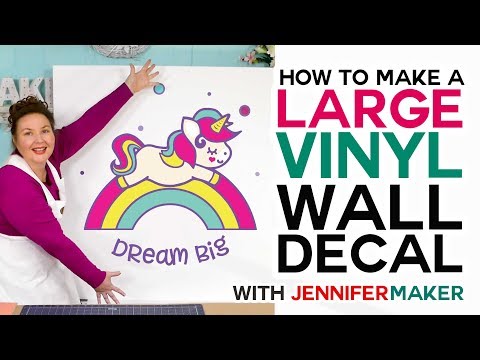
Finally, you need to consider the design. Not all designs will translate well to the wall — you’ll want to start with a high-quality SVG, not a PNG or other lower resolution image. For this tutorial, I drew a couple of cute unicorns. They’re sized at 10″ in the file, but you can scale them up to whatever size you want (I went to 31″ high). Now as 31″ high is too big to all fit on one mat, you need to separate it into mat-sized pieces and then join it after you cut it.
STEP 1: GET A DESIGN YOU CAN SCALE UP AND PREPARE IT FOR CUTTING
STEP 2: PREPARE AND CUT YOUR VINYL
STEP 3: WEED YOUR VINYL FOR YOUR WALL DECAL
STEP 4: ASSEMBLE AND LAYER YOUR DESIGN
STEP 5: APPLY YOUR TRANSFER TAPE
STEP 6: PUT YOUR LARGE DECAL ON YOUR WALL
So I’m hoping you now see how to make large projects that are bigger than your cutting mat. It’s not difficult to do — you just need to separate whatever you want to make into mat-sized pieces and then put them together again after you cut them out.
#Cricut #CricutMade #DesignSpace
==================
I appreciate every subscriber. It’s free and easy to subscribe — just click: http://bit.ly/sub2jennifer
Prefer to get my updates and free project patterns delivered straight to your e-mail inbox? Subscribe to my free newsletter at https://jennifermaker.com (scroll to the bottom)
Follow me at:
Blog: https://jennifermaker.com
Facebook Page: https://www.facebook.com/jennifermakercrafts
Facebook Group: https://www.facebook.com/groups/cricutcraftersandmakers/
Instagram: https://www.instagram.com/jennifer.maker
Pinterest: https://www.pinterest.com/jenuinemom
Please subscribe to my channel at https://www.youtube.com/c/jennifermaker for more video tutorials to craft a life you love!
Credits:
Introduction: PixelBytes (my child!)
Music: Cute by Bensound (licensed, royalty and copyright free)
Videography: Jennifer Marx on a Panasonic Lumix FZ-1000 DSLR 4K camera
Design: A Jennifer Maker original!
