How to Fill in Text on Cricut

Fill in Text on Cricut
How to Fill in Text on Cricut is a delicate process, so it’s important to know how to handle it. This is especially true if you’re using cursive fonts or script typefaces.
The operation mode that you select in Cricut Design Space determines how your text will look on your project. Typically, “Cut” shows your design as a solid shape; “Pen” shows it as an outline.
Type Your Text
Cricut Design Space makes it easy to personalize your projects with text and different fonts. You can use Cricut fonts or system fonts on your computer or mobile device.
Unfortunately, most system fonts do not include writing style fonts which means you can’t cut them with your Cricut machine. Luckily, there is a way to fill in those fonts on your project using a Cricut Pen.
You can also use multiple line boxes to fill in solid letters, or you can curve the words. To do this, select your word and drag left or right on the text box until you have a desired Diameter of curvature. Then, let go of the mouse button.
How to Fill in Text on Cricut – Choose a Font
If you are looking to create a project in Cricut Design Space that uses text, it is important to choose the right font. This can help your project look its best and make it easier to cut.
One of the biggest things to consider is whether you want a writing font or an outlined font. An outlined font will be thick and will look like it’s been drawn on.
To find the correct font for your project, you can search for a font on a website or download a free font from a site that offers free fonts. Some websites also offer commercial licenses that you can pay for to use on your projects.
Change the Font Style
Cricut allows you to use your own fonts or system fonts when filling in text on your project. This allows you to customize your project so it is unique to you and your family.
When you want to use a font that has a different style, simply click on the style tab to open the options. For example, if you have the ‘Cutting Writing’ font, it has 5 styles to choose from.
If you don’t see a font that you are looking for, try typing the name into the search bar and select “System.” This will filter the list to only show your system fonts, or all fonts.
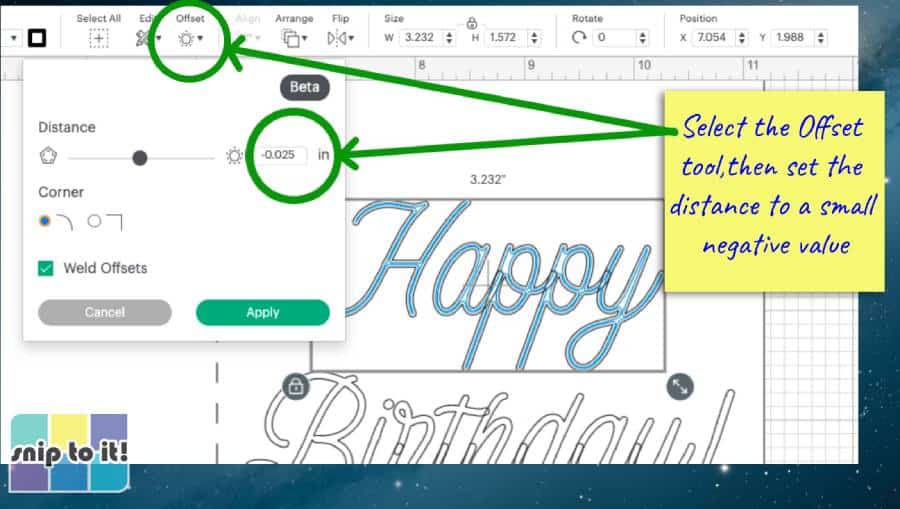
If you are using a font that is too thick for your project, you can change the font thickness using tools like Bold or Offset. These are easy-to-use tools that will make your words look more professional.
Change the Font Size
You can change the font size on cricut by clicking on the text you want to alter. Once you click on the text, a new tool box will open on top of the screen.
Once you have the font you wish to use, it will show up on the canvas. This will be the default font that Cricut Design Space uses for every new text box that you create.
You can filter fonts in Design Space by System (fonts that you have on your computer) or Cricut Fonts. This is a great way to narrow down your search to find the perfect font for your project!
How to Fill in Text on Cricut – Change the Font Color
In Cricut Design Space, you can change the color of text boxes by clicking the Edit Toolbar at the top. If you have more than one text box selected, you can also change the color of each one separately.
You can also use a system font on your device (that you’ve installed) in Cricut Design Space. This works well for certain types of designs, though there is one important pitfall to watch out for.
If you’re working in offline mode, the font won’t appear in your Cricut fonts list. To download a font for offline use, click the “Download” button at the far right side of the font selection dropdown.


