Cricut AutoPress: Your Get Started Guide
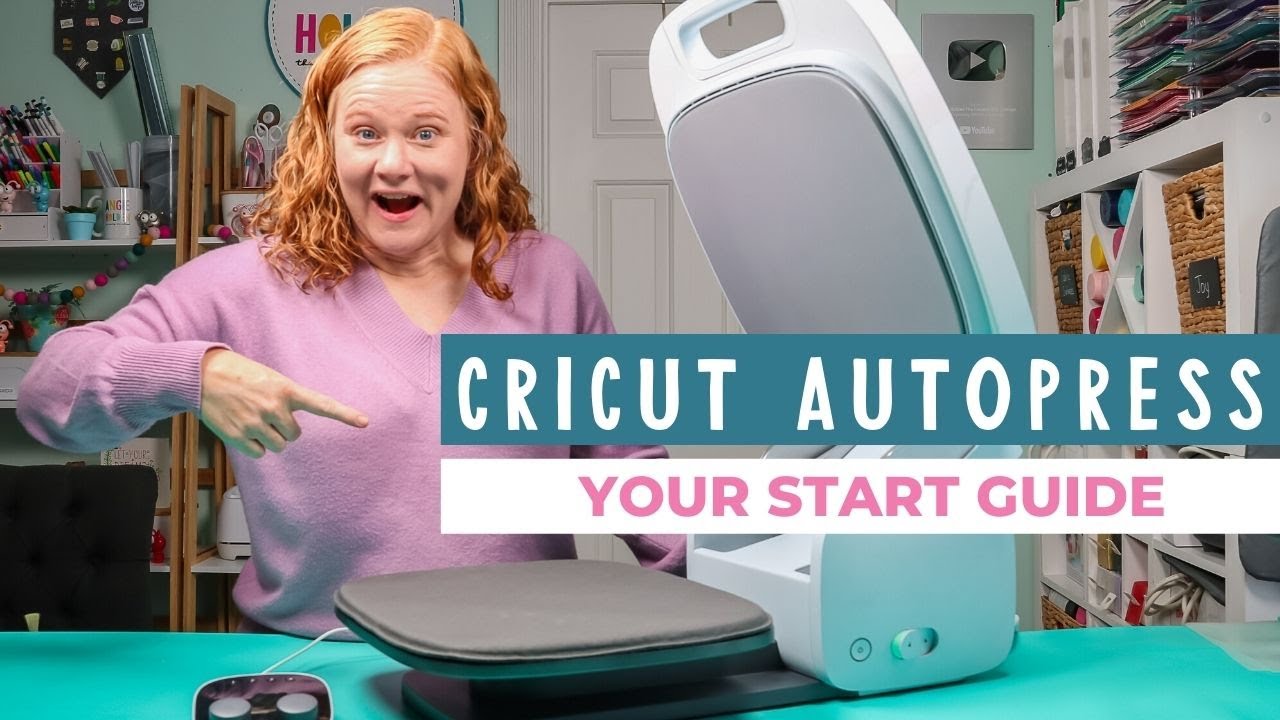
Hello and welcome My name’s Angie Holden and I’m the blogger behind The Country Chic Cottage. So today is an exciting day, because Cricut is releasing three yes, three new machines today and one of those is the Cricut Autopress. So now Cricut sent me this machine. However, this video is not sponsored and in this video we’ll be opening it taking a look at the machine and what it does So watch the entire video see what other questions you have ask those questions in the comments section and I’ll do future videos answering all Your question about Cricut Autopress
And if you wan na see the other two new releases, I have those as well and I’m putting all those videos up today. So you can head to my YouTube channel and check out all three new releases. So now, let’s open Cricut Autopress and see what’s inside And as you can see, it’s huge All right. All I did was take the top off the box and there are some numbered boxes So number one and number two and there is Autopress itself which I will take out. But let’s look at what is in the boxes.
Number one Looks like it has some kind of control panel as well as a cord, and it looks like a Get Started. Guide Number two has what looks like the power cord. So now that I have all my cords everything’s out. Let me go ahead and take out the machine and let’s take a closer look.
And here is the Autopress itself out of the packaging
When you get it out of the packaging, it will be locked, There’s a lock button at any time, so you can lock it closed. So it’ll look like this when you get it out. The lock button is on the side with the power button, So you can just click unlock and watch out because it will swing open.
And now Autopress is open. I did wan na note that the Autopress also comes with a removable mat that you can remove off of the bottom plate. Now this mat does come inside the Autopress. So when you open up the Autopress, don’t be looking for a separate mat, It’s actually inside the press itself. I did also wan na note that the mat that comes with the Autopress has a non-slip backing on it. So that means it is different from the EasyPress mat and you’ll find that it won’t slide around on the plate, but it is removable, so you can remove it. Put your blank on. It then add it back to the Autopress
And if at any time again you want it to stay closed, you would just close it down and hit the Lock button and then it’ll stay closed. So it is locked and it is closed. There’S actually a handle on this side, as well as a little space on this side for your hand, so that it’s easy to lift. You can also carry it by this handle Now that we have the Autopress out of the box and all of our pieces. Let’S look at how to set it up.
The documentation you get with Autopress is as follows. So the first card has a website address for the activation and setup of your machine. You must connect this machine to a computer, to activate it and register it before it will work. You need to have a computer with a USB port. If you have a newer Mac, you might need an adapter to do so.
Next step is a guide for the Autopress that will have some instructions. Then you’ll have some warranty and safety information Box. One contains this control panel as well as this cord
On the back of this control panel, you can switch Autopress from Fahrenheit to Celsius. I’M going to put mine on Fahrenheit
Next you’re going to install this into the cord into the Autopress box. This is the bottom of the box. Then, once you press that cord into place control box is now ready, The control box itself has two dials, as well as four buttons up top that are each numbered one. Through four Box, two contained my power cord
One end will go into the wall. The other end will go into Autopress. So let’s look at how to set this up. The first thing you wan na do is plug one end of the power cord into the back of Autopress. Once that’s plugged in, we can begin setup At this point. You wan na pull up either the website cricut.com/setup or Cricut Design Space
I’M going to do this in Cricut Design Space First, I click the three lines in the upper left-hand corner and then I click New Product Setup and then click Heat Press. At this point, Design Space will walk you through the process. What you’re going to do is plug Autopress in and you’re going to plug the controller into your computer. So the controller end is a USB end.
It will go into the Autopress after we finish this setup procedure, but for now we’re going to plug it into a USB port in our computer. If you plug the controller into the Autopress at this point, it will give an error and tell you to plug it into a PC. I’M going to go ahead and walk through the setup in Cricut Design. Space Design Space will walk you through the procedure, but let’s watch the controller as I do this, so you can see what will happen on your controller interface Once Design Space recognizes that I have the controller plugged in. I agree to the Terms of Use and Activate
Now Design Space is preparing my machine and you will see the controller start counting down.
Once your Control Pod is up-to-date, you are done in Design Space. You can remove the USB from your computer and plug it into your heat press. Let’S finish the setup on the Autopress itself. Now you just plug the USB end of the Control Pod into the Autopress
Now that we have Autopress set up and operating, let’s take a look at the buttons what they do, how to operate. Autopress, Maybe even like a project On the sides of Autopress. You have a Lock and Unlock button, and that’s what I hit earlier to open it. You also have your Power button, So I wanted to show you what happens if I turn the power on now that my machine is activated and I have it in the locked or closed position.
What will happen is the display will show a lock icon and it will not heat up. So you do need to unlock it and have it open in order for Autopress to heat up. So let’s go ahead and hit that Unlock button again. Opening Autopress up
( Autopress motor hums ), You might hear on the camera the motor starts to run So it does have a blower inside that ensures that your entire heat plate is heating up to the same temperature. So I do have it heating up and we’ll take a look at the control panel in just a second. But first, let’s talk about a little bit of the specifics of Autopress, because Autopress takes about eight minutes depending on the temperature to heat up
So we have a few minutes to talk about the specifications, So the heat plate itself is 15 inches by 12 inches and that’s 12 inches deep by 15 inches wide
So in total, if you’re looking for space that you need for Autopress, you’ll need 16.63 inches wide and then 26.07 inches deep
Now some of this front portion can hang off your table and I will put it on the table that I’m planning on keeping it on in a few minutes. So you can see that a portion of this is going to hang off my table. The base itself is sort of inset from this outside lip, so you do have a little bit of wiggle room within those dimensions.
So you need approximately 22 and a half inches give or take from the back to that lip that I was talking about on the bottom, for it to fit on any table. So this is like a typical counter lip, which is what they were going for when designing Autopress. So the entire thing does weigh 53 pounds, so we will take a look at some storage options.
So you can store it like this flat. You can sort it open, you can store it closed and I have another idea for you so stay tuned for that.
So there is no adjustment for Autopress as far as pressure or height, When we close it. Your base material can actually be up to two inches thick. So as I bring it down, you can see that it’s at an angle until it gets to about right here And then I can press it down on the surface.
So your surface can be up to two inches thick, so that means you can do a variety of surfaces with Autopress and in a future video I’ll, be testing a ton of different surfaces so be sure to stay tuned on YouTube for that. So now, let’s pretend it’s heated up and there’s something inside. How does Autopress actually press? So when you press it down? First of all, it’s easy-close, so you can close it with two fingers and you just press down ( Autopress, whirs ). You might hear a motor engage
That’S because Autopress is automatic, So it just presses down and presses with the right amount of pressure. So I am going to do a future video with things that supposed require different pressures and see if Autopress will press each of those
Now this is heating up, and you can see that I am touching the top. That is because all of this plastic stays cool.
That motor that you hear running also keeps the heat away from the handle, So this handle stays cool at all times And it auto-opens. So once it’s done with the time, that’s on the controller it’ll auto-open, so you don’t even have to be around when it finishes.
So feel free to press and then start working on your next blank, because Autopress will just open when it’s complete.
So, let’s press it down once again and let’s say that I pressed it down and I’ve made a mistake. So I realize I didn’t mirror my iron-on or something, and I want to lift it back up. That’S easy as well. You just lift up on the handle Couple. Fingers just lift up it. Pops right, open,
It does pop open automatically, so I don’t have to lift it up all the way. So two fingers to close. It’S engaged, it’s locked, it’s pressing and then a couple fingers I just kinda pop the handle and up it goes
However, if I wanted it to press for the full time, I could close it allow it to press and it’ll pop open on its own when that time’s done So it does go up to 400 degrees. So that means it’s good for infusible ink, sublimation and HTv and yes, I will be testing out this in future videos, so stay tuned for that.
We are going to make one project today with HTV, and I tried to make a large project that you really couldn’t do with one press with the EasyPress. So I thought that would be a little bit of a test for Autopress today, but I’m definitely going to put it through all the tests later And, as you can see, hands were on the table. I didn’t touch it. It was done with the time that’s set on the controller and it popped open on its own. So now, let’s a look at that controller and how to set your time and temperature before we press something.
Currently, I have Autopress heating to 330 degrees for 30 seconds, Adjust your dial up or down to the temperature you want with the dial up or down to the time you want.
So super easy to change your time and temperature. Now, where do you get your time and temperature Autopress does not work with the new Cricut Heat Up, so you will need to set the time and temperature manually
So you’ll look on the Cricut Heat Guide for the time and temperature and set it accordingly. Now this will go up to 400 degrees, maximum and the maximum time is 600 seconds, which is 10 minutes, which would be plenty of time for most surfaces.
Now, let’s talk about these buttons at the top, These are presets and they will come with something programmed in. So you can see, as I click each one, it will flash and tell me what the preset is and set it to that setting.
You wan na change these presets at any time to something you use more often they’re, just like setting something on a car radio. So let’s say on this last one instead of 385 for 30. I wanted it to be 400 for 30, So I’m going to change it to 400 for 30 and I’m going to hold down this last button, where I want that preset to go And hold it down it flashes and beeps, and now and now this preset is 400 for 30 seconds – and you have four preset options to choose from So if you have four different blanks that you use all the time, the presets will be super convenient to add your times and temperatures into those
Now, what if you’ve accidentally changed those presets and you wan na go back to the factory setting? You could put a paperclip in this hole and it will reset Autopress settings Now that Autopress is heated up. I have my pillow cover and I’m just going to add it preheated just a few seconds just to remove any moisture or anything from the material. Now you don’t really have to reset your dial to do the preheat, because you can just lift it up So now that it’s preheated, let’s add our HTD to the surface.
So just located my HTV into place on my blank and I have Autopress set to the right time and temperature so now HTV’s on here. All I have to do is press it down Press the handle down it engages with the right pressure, and all I have to do is wait Now. This is a great time to prep your next blank Buying. An extra mat for the Autopress is a great investment. That way you can be prepping your next blank over to the side when Autopress is done and pops out, you remove one mat and all and put the other one inside press down again.
So if you do a ton of projects that involve a heat press, this press is really great for that. So now, let’s remove the carrier sheet from the HTV and take a look at our final project. So now here’s my project and it’s complete. I went ahead and put a pillow inside Now. Let’S talk about how you turn Autopress off
So, first of all, if it’s on and heated up – and you close it ( Autopress, whirs ) and hit this Lock button over here, because I wan na lock it closed it’s going to beep at you and really get annoying because you can’t lock it with it. On So you will need to hit the Power button to turn it off.
So you need to lock it and turn it off to store it in the closed position. Now, if you have it on and you wan na store it in the upright position, all you need to do is press the Power button. So I just press the Power button and turn it off.
And it will cool in this position Now. If I want to store it closed, I can turn it off. Then close. It then lock it
It can cool closed, So the mat inside will be fine if it’s closed while cooling down. So you don’t have to worry about that.
You don’t have to do anything on the controller. The Power button controls the press itself Now it does have an Auto-Off feature and it will shut itself off after 13 minutes if you’re not using it. So this is where my Autopress will live when I’m not making videos like the one I just made, So I did have to scoot it out a little bit on this table, but the base is still on the table, which is what I was talking about.
And then I just adjusted these shelves a little bit. It opens up, it doesn’t hit anything and it’s ready to use
So then I can just plug it in turn it on, and then I have my dial over here to the side. So those of you with a small space or a small crafting area, there’s another feature of Autopress that you might like. So you can unplug both the power cable and the control panel and store Autopress sitting on its back upright
So this could fit in a closet. It could fit behind a door Standing up like this. It could fit a ton of places. Now it’s still heavy still weighs 53 pounds. However, you can hold it by the handle at the top and carry it like this. Now. It is kind of awkward I like to carry it by the handle on the front, as well as there’s like a spot on the back, that your hand fits in, I like to carry it by both and carry it flat instead of carrying it upright, like this
Just because of the weight, it’s a little bit awkward for me, but either way works, and you can definitely store it like this. If that solution works for you,
So, let’s wrap things up with what I think will be your frequently-asked questions. Now, if I don’t cover your question in this section or in this video feel free to drop down in the comments section, Ask any questions. You have I’ll answer those in the comments section or in a future video
And I do have several videos for Autopress planned, so I can cover everything like if you wan na know how well does it work on a certain type of material? I will be covering that I guarantee it. I have a ton of information planned for you,
But for now let’s talk about who Autopress is for So Autopress is a professional-level press. It is for people that are heat-pressing several objects and want that automation and what that ease of use.
So you saw how easy it was to use right, So I pressed it down with two fingers. It was easy to set the time and temperature the pressure’s all set for you. I don’t have to press down while it’s pressing. I can work on prepping my next blank, So it’s for people that are doing multiple of whatever Shirts invisible ink projects, sublimation projects
Yes, it does work on all three HTV sublimation as well as infusible ink, So you can do all those projects in Autopress. I will be doing a full video on Autopress with sublimation, so we can test all the things and make sure it works with all your sublimation blanks.
So Autopress is great for, like small business owners, people that own their own business, people that are making a lot of shirts for something like a volunteer organization or a charity. That type of thing
So anywhere, where you’re doing mass production would be where I would recommend Autopress, It obviously takes up more space, but you have the larger heating area, so the 15 by 12 heating area is amazingly nice. I must say Made that big pillow all in one press. So we talked about how it automatically did the pressure. There is no way to adjust the pressure with Autopress, so I will be doing several tests of what that means for various crafts as well as various surfaces and see if Autopress can handle those. Given that you can’t adjust the pressure manually,
So that does mean it automatically adjusts the pressure, no matter how thick your blank is. So we talked about it could go up to two inches, Whether you have a two-inch blank in there of some type like, let’s say, wood or a shirt in there. That’S really thin both of those it will auto-adjust the pressure to be exactly the same for both. So you don’t have to worry that the two-inch is going to have more pressure, because it’s higher up The Autopress takes care of that
And that also means that you might have to do some experiments, So maybe the time and temperature need to change with your blank, because the pressure cannot be adjusted. So there may be some experimental things there and you may need to do a few test presses to get it right before you can make certain blanks or certain crafts in the Autopress. One thing we haven’t talked about yet is the design
I personally love it.
So most commercial heat presses are extremely big, they’re bulky ugly. They actually take up more space than this. If you were to get a 15 by 12 press, This is actually fairly compact for a 15 by 12 press. I love the storage options with it. I love that it can be stored flat,
I love that it locks into place And the fact that you can store it vertically is amazing for people that want to start a small home-based business, but might not have the space to dedicate to the business all the time.
So maybe you need to fold it up, for you know, Thanksgiving and the holidays and use that area for something else. You can definitely do that with Cricut Autopress. The auto-open is my other favorite feature.
I’Ve actually been wanting a heat press with auto-open for a while That feature alone makes me extremely happy, because I don’t have to worry about opening it back up. I can go ahead and be prepping. My next blank ready to put on the heat press without having to worry about stopping opening the press when it chimes or whatever and some of my presses, don’t even chime. So this actually opens lets me know it’s done and I can remove my blank and add the next one.
All right, so that’s all I have for today for Cricut Autopress. Hopefully that introduction is enough to get you a little bit excited about this machine and maybe put some questions in your mind.
So again, drop down in the comments section. Ask any questions that you have about: Cricut Autopress I’d be happy to answer those. If you liked this video, if you learned something, give us a thumbs up and don’t forget head on over to our YouTube channel hit that Subscribe button, We’re going to have several Autopress videos, answering all of your questions and maybe questions you didn’t even know you had About Cricut Autopress – and I don’t want you to miss any of those
So, thank you guys so much for joining me. I’Ll see you next week, bye-bye..
http://freesvgfiles.info/help-and-advice-articles/%e2%9c%a8-how-to-sublimate-with-your-cricut-easypress/
Read More How To Sublimate With Your Cricut Easypress

